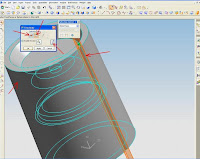
We can create one or more curves in a sketch by projecting an edge, loop, face, curve, or adjust the sketch to sketch curves plane.Dalam convert an entity the steps we have to do is:
1.In this sketch open,
click on the model edge, loop, face, curve, external contour sketch, set of edges, or sets of curves.
2.Klik Convert Entities on the Sketch toolbar,
or click Tools, Sketch Tools, Convert Entities.
For On the Edge.
The sketch can be made between the new sketch curves and entities.
To Fixed
Sketches can be made internally at the endpoints of the body so that it remains in a state sketch "fully defined".
Internal relationship is not shown if we use the Display / Delete Relations.
Release Fixed interesting relation with the end point.
 1.Di Draw menu, click Circle Tan, Tan, Radius.
Tangent command starts the object snap mode.
2.Select the first object to draw a circle tangent to.
3.Pilih second object to draw a circle tangent to.
4.Isi specify the radius of the circle.
5.Klik OK

 1.Di Draw menu, click Circle Tan, Tan, Radius.
Tangent command starts the object snap mode.
2.Select the first object to draw a circle tangent to.
3.Pilih second object to draw a circle tangent to.
4.Isi specify the radius of the circle.
5.Klik OK

 We can create one or more curves in a sketch by projecting an edge, loop, face, curve, or adjust the sketch to sketch curves plane.Dalam convert an entity the steps we have to do is:
 Trimming body
Cylinder axis
Vector direction pointing away from the axis cylinder
Target body
Results trim features body