Unigraphics, create a simple extrusion using a sketch

We will start using the existing facilities in Unigraphics to draw 3dimensi. One of the facilities we will use to draw 3d is Extrude
Use this facility to create a body with sweeping 2D or 3D profile curve, edge, face, sketch or feature curve is linear distance in a certain direction.

The steps create a simple extrusion using a sketch
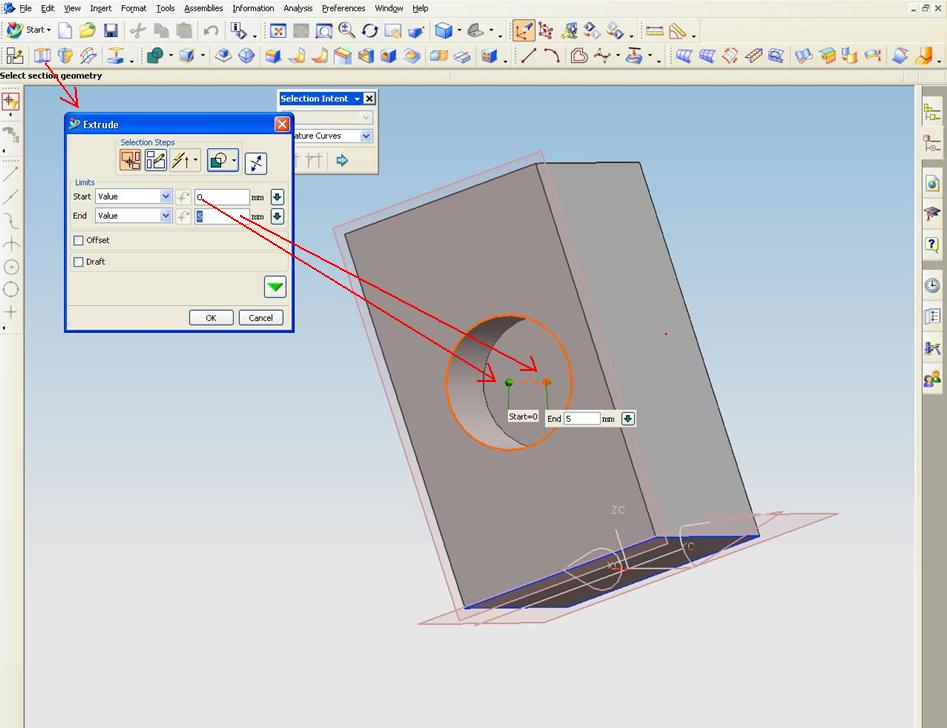
1. Select the Extrude option, a dialog bar that displays the Extrude dialog.
2. Setting Selection of Intent to Add Connected.
3. To select a set of strings profile curve or edge, or a sketch.
Preview display features extruded using a default value.
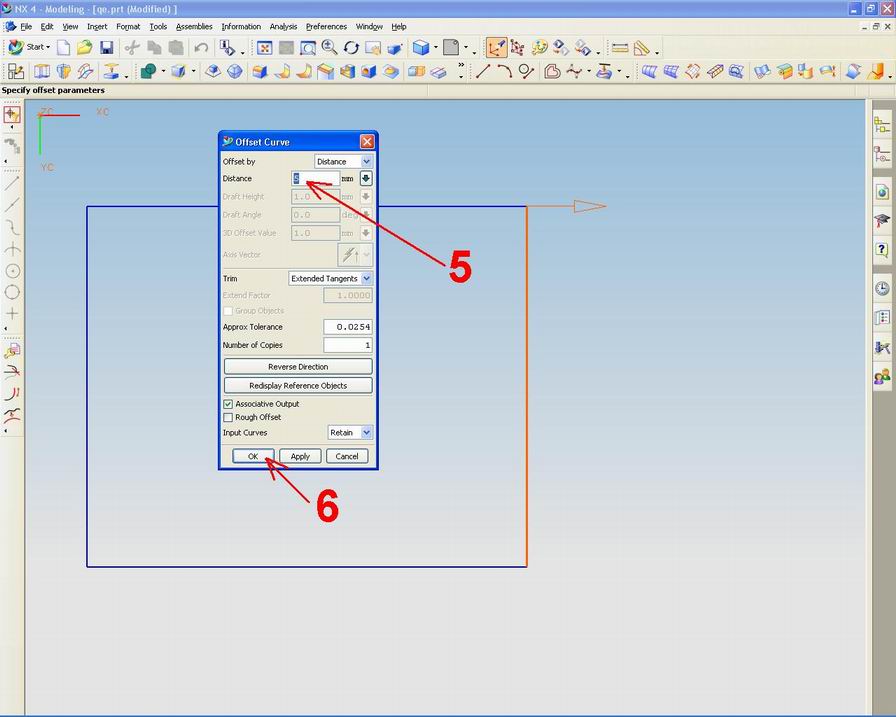
4. Limit Pull the handle, or use the distance field in the dialog box or in a dynamic input to the desired size of the extrusion.
5. Click OK. Recommended extrusion has been made

Comments Off

Autocad, Rotating Object

If we design changes or we pull the wrong angle, we may need to rotate one or more objects that we make.
we can easily rotate an object or objects around the basic point that we specify.
Base point is usually the object snap points on the object.
To demonstrate the rotation, determine the angle of rotation.
By default, the zero is to the right, and increased degrees if counter-clockwise.
To change the default, select Format> Units
By setting a negative angle, we can change the object clockwise.
To rotate the object, choose Rotate from the Modify toolbar and select one object.
Alternatively, select the object and then select Rotate from the Modify toolbar.
Specify base point: prompt, indicating a point about what we want to play.
Specify rotation angle or [Copy / Reference]: prompt, type the angle on the command line.
Use the Copy option to make a copy of the original object.
Once we use the copy option, the prompt return of the same so that we can determine the angle of rotation.
Eventually there will be two objects, one in the original rotation angle and rotation angle new one.


  • Read more........
  • Comments Off

    The new features rib

    The Rib PropertyManager appears when we make new features rib, or when we are editing an existing feature rib.
    PropertyManager controls the following properties:
    Parameter
    Thickness. Adding thickness to the selected side of the sketch. Select one of the following:
    First Side. Adding material to only one side of the sketch.
    Both Sides. Adding the same material to both sides of the sketch.
    Second Side. Adding material just to the other side of the sketch.
    Rib Thickness. If we add the draft, we can adjust the thickness of the sketch plane or at the interface of the wall.
    In the sketch plane
    At the wall interface
    Extrusion Direction. Select one of the following:
    Parallel to Sketch. Creating rib extrusion parallel to the sketch.
    Normal to Sketch. Creating normal rib extrusion sketch.
    Flip material side. Changing the direction of extrusion.
    Draft On / Off. Adding draft rib bone. Set the Draft Angle to determine the degree to draft.
    Draft Outward (Available when the Draft On / Off selectable). Creating a design corner outside. If cleared, creating a design into the corner.


    Comments Off

    Unigraphics, make a line with an offset

    If we choose the offset, we select a line that was created as a baseline (reference site) to make a line offset.
    This is useful if we want to more quickly make a lot of lines where each line offset is made from the previous line.

    Steps - steps that must be done to make a line with an offset:

    1.Select menu offset curve

    2.Select the object that will be offset

    3.klik OK on the tool offset curve

    4.tentukan distance you want to create

    5.klik OK to terminate the process


    Comments Off
    Powered by Blogger.